Service Management and Orchestration (SMO) OAM Deployment and Configuration
This document focuses on a docker-compose deployment solution for SMO/OAM Components. Such deployment should be used for research and development.
Introduction
With respect to Operation and Maintenance (OAM), the SMO implements the O1-interface and OpenFronthaul Management-Plane consumers. According to the O-RAN OAM Architecture and the O-RAN OAM Interface Specification, the SMO implements a NETCONF Client for configuration and a HTTP/REST/VES server for receiving all kinds of events in VES format.
The O-RAN-SC OAM deployment contains an OpenDaylight-based NETCONF client and an ONAP VES Collector. Kafka is used as a message router for communication between the components. The Keycloak implementation offers an Identity service, while traefik acts as a reverse proxy to terminate all incoming https traffic. For storing data in a persistent way, the implementation of the mariaDB project is used.
SMO OAM Components
This docker-compose file starts a pre-configured, self-contained SDN-R solution with the following components:
Identity … representing a Keycloak-based identity service for centralized user management. Please note that the implementation does not support IPv6. Therefore, its own network is required called
DMZ.Controller single node instance … representing the NETCONF consumer on the Service Management and Orchestration framework (SMO) for O-RAN O1 interface and/or O-RAN OpenFronthaul Management Plane and/or other NETCONF/YANG schemas implemented by the OpenDaylight project.
VES collector … representing the VES (REST) provider at SMO for all kinds of events.
Messages … representing the SMO MessageRouter component, includes message-router.
Gateway … representing a reverse proxy terminating TLS traffic (https, NETCONF).
Prerequisites
Operating (HOST) System
$ cat /etc/os-release | grep PRETTY_NAME
PRETTY_NAME="Ubuntu 24.04.1 LTS"
Docker
$ docker --version
Docker version 27.5.1, build 9f9e405
Docker configuration for IPv6
In case you prefer IPv6 support the docker configuration must be modified.
Please see: https://docs.docker.com/engine/daemon/ipv6/
Edit /etc/docker/daemon.json, set the ipv6 key to true and the fixed-cidr-v6 key to your IPv6 subnet. In this example we are setting it to 2001:db8:1::/64.
{
"registry-mirrors": [
      "https://nexus3.o-ran-sc.org:10002",
      "https://nexus3.onap.org:10001"
],
"log-driver": "json-file",
"log-opts": {
   "max-size": "10m",
   "max-file": "3"
},
"ipv6": true,
"fixed-cidr-v6": "2001:db8:1::/64"
}
Reload the Docker configuration file.
$ systemctl reload docker
Docker Compose
$ docker compose version
Docker Compose version v2.32.4
GIT
$ git --version
git version 2.43.0
Please clone the following repositories: - https://gerrit.o-ran-sc.org/r/admin/repos/oam,general - https://gerrit.o-ran-sc.org/r/admin/repos/sim/o1-ofhmp-interfaces,general
Python
$ python3 --version
Python 3.12.3
A python parser package is required:
python3 -m venv .oam
source .oam/bin/activate
pip3 install requirements.txt
ETC Host (DNS function)
Your local IP and your used interface are required. Use the following
script to modify all .env and other configuration files accordingly.
The script will find automatically the interface and its IP address to
the internet. You can check its usage with the option -h:
python3 ./adopt_to_environment.py -h
Please run the script with your preferred fully qualified domain name you would like to use in your browser address bar:
python3 ./adopt_to_environment.py -d <your-smo-fqdn>
You can revert the settings in the modified .env and configuration
files using the option -r:
python3 ./adopt_to_environment.py -d <your-smo-fqdn> -r
It is beneficial (but not mandatory) to add the following line at the end
of your ~/.bashrc file. It will suppress warnings when Python scripts
do not verify self-signed certificates for HTTPS communication.
export PYTHONWARNINGS="ignore:Unverified HTTPS request"
Please modify the /etc/hosts of your system or modify the DNS of your
environment:
<your-system>: hostname of the system where the browser is started<deployment-system-ipv4>: IP address of the system where the solution will be deployed
$ cat /etc/hosts
127.0.0.1                localhost
127.0.1.1                <your-system>

# SMO OAM development system
<deployment-system-ipv4>               smo.o-ran-sc.org
<deployment-system-ipv4>       gateway.smo.o-ran-sc.org
<deployment-system-ipv4>       identity.smo.o-ran-sc.org
<deployment-system-ipv4>       messages.smo.o-ran-sc.org
<deployment-system-ipv4>   kafka-bridge.smo.o-ran-sc.org
<deployment-system-ipv4>       kafka-ui.smo.o-ran-sc.org
<deployment-system-ipv4>    odlux.oam.smo.o-ran-sc.org
<deployment-system-ipv4>    flows.oam.smo.o-ran-sc.org
<deployment-system-ipv4>    tests.oam.smo.o-ran-sc.org
<deployment-system-ipv4> controller.dcn.smo.o-ran-sc.org
<deployment-system-ipv4> ves-collector.dcn.smo.o-ran-sc.org
Usage
Bring Up Solution
Short story
The following commands should be invoked. More details can be found in the next chapters.
source .oam/bin/activate
./setup.sh
Simulated network
Before starting the simulated network, you need to locally build the docker images. This is because of copyright issues with the 3GPP YANG models.
The build should be straightforward. The repository containing the PyNTS code needs to be cloned, and then you run a command to build the images. Run this in another terminal, in another folder (not in this repo):
git clone "https://gerrit.o-ran-sc.org/r/sim/o1-ofhmp-interfaces"
cd o1-ofhmp-interfaces
make build-all
After everything is built successfully, you can return to your solution folder here and start the network:
docker compose -f network/docker-compose.yaml up -d
docker compose -f network/docker-compose.yaml restart pynts-o-du-o1
Check (adjust if required) environment variables
nano smo/common/.env
nano smo/oam/.env
nano network/.env
Startup solution
Please note that it is necessary to configure the identity service first, before starting additional docker images.
The several docker-compose yaml files must be started in the right order as listed below:
docker compose -f infra/docker-compose.yaml up -d
docker compose -f smo/common/docker-compose.yaml up -d
python smo/common/identity/config.py
The python script will configure the users within the identity service (Keycloak). A system user (%USER) is also created with administration rights.
docker compose -f smo/oam/docker-compose.yaml up -d
Looking into the ONAP SDN-R logs will show the startup procedure:
docker logs -f controller
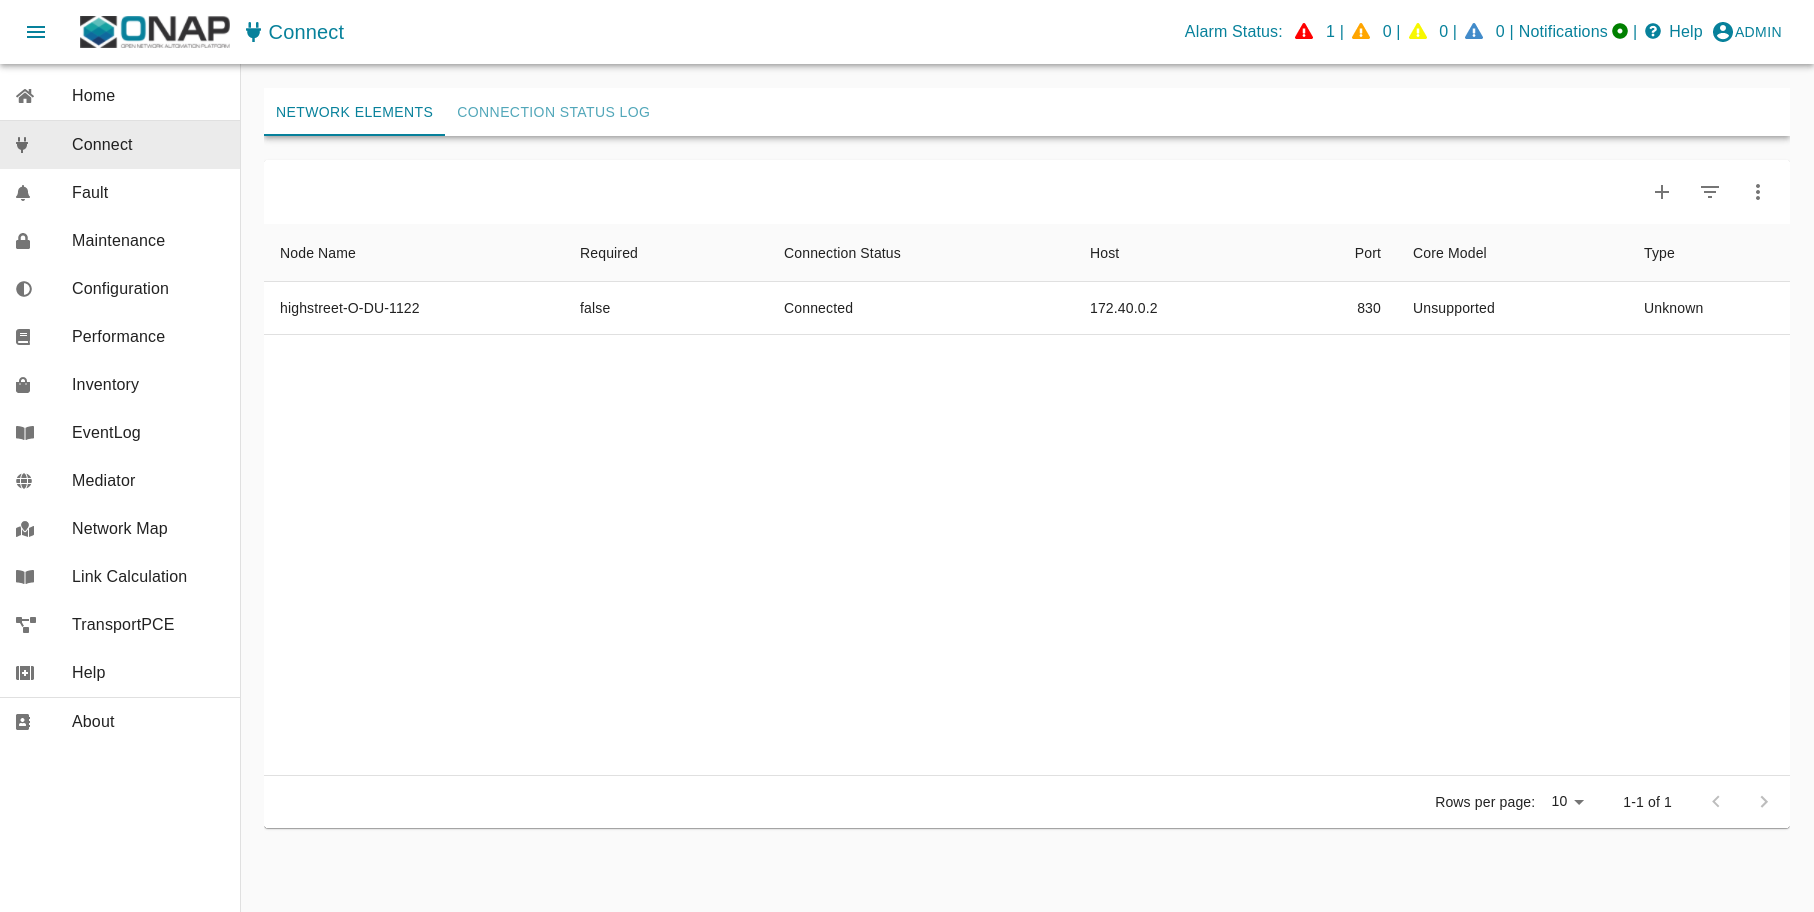
If you see the login page (https://odlux.oam.smo.o-ran-sc.org), you
are good to go and can start the (simulated) network:
docker compose -f network/docker-compose.yaml up -d
Usually the first ves:event gets lost. Please restart the O-DU Docker
container(s) to send a second ves:pnfRegistration:
docker compose -f network/docker-compose.yaml restart pynts-o-du-o1
The simulated O-DU and O-RUs are pre-configured according to O-RAN hybrid architecture.
O-RU - NETCONF Call HOME and NETCONF notifications
O-DU -
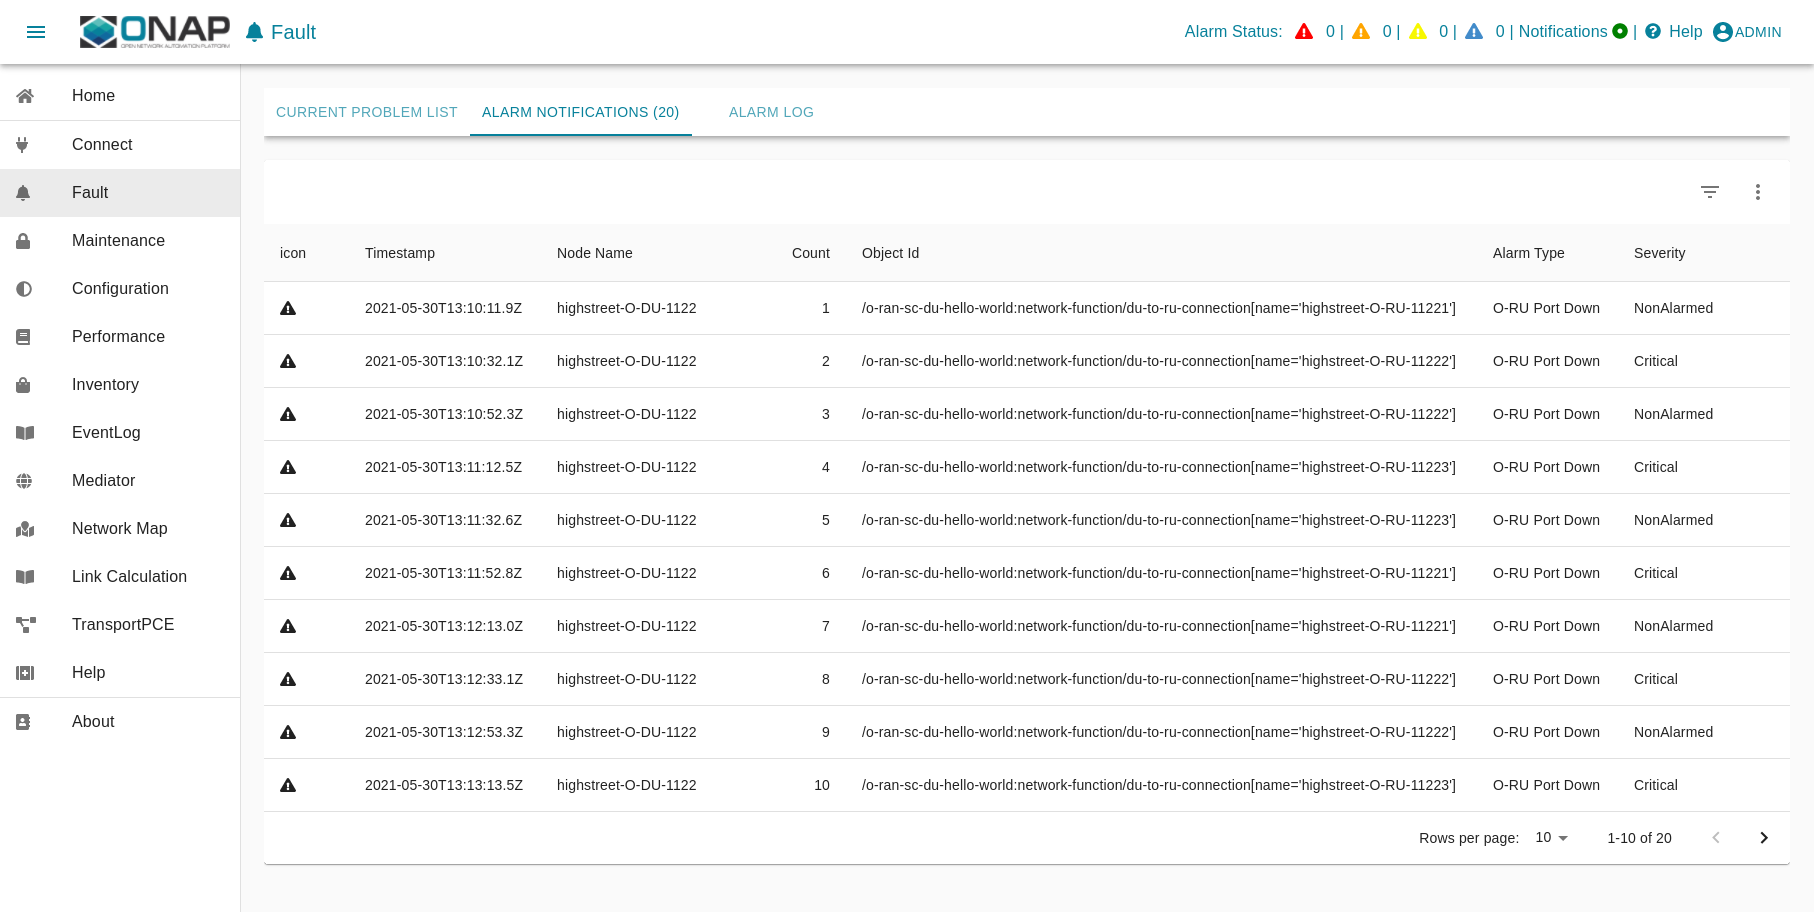
ves:pnfRegistrationandves:fault,ves:heartbeat
ves:fault events are processed and finally visible in ODLUX:
Log files and karaf console
ODL karaf.logs
docker exec -it controller tail -f /opt/opendaylight/data/log/karaf.log
ves-collector logs
docker logs -f ves-collector
Customizing Solution
.env file contains various customizing parameters.
Verification Solution
Access to SDN-R ODLUX
Access the following URL in your browser:
https://odlux.oam.smo.o-ran-sc.org
User:
adminPassword: (see .env file)
In case of trouble, please update your customized .env file.
Access to Node Red Flows
https://flows.oam.smo.o-ran-sc.org
User:
adminPassword: (see .env file)
Again, update the commands with your customized .env file if needed.
Terminate solution
To stop all containers, please respect the following order:
docker compose -f network/docker-compose.yaml down
docker compose -f smo/apps/docker-compose.yaml down
docker compose -f smo/oam/docker-compose.yaml down
docker compose -f smo/common/docker-compose.yaml down
docker compose -f infra/docker-compose.yaml down
Alternatively:
./teardown.sh
Cleanup
Warning
Be careful if other stopped containers are on the same system.
docker system prune -a -f
Troubleshooting
In most cases, the .env settings do not fit the environment and need
to be adjusted. Please ensure that the network settings do not overlap
with other networks.
Use commands like:
docker ps -a
docker compose ps
docker rm -f $(docker ps -aq)